打开Mac mail,点击左上角“邮件”,添加账户
选择“其他‘邮件’账户”,点击“继续”
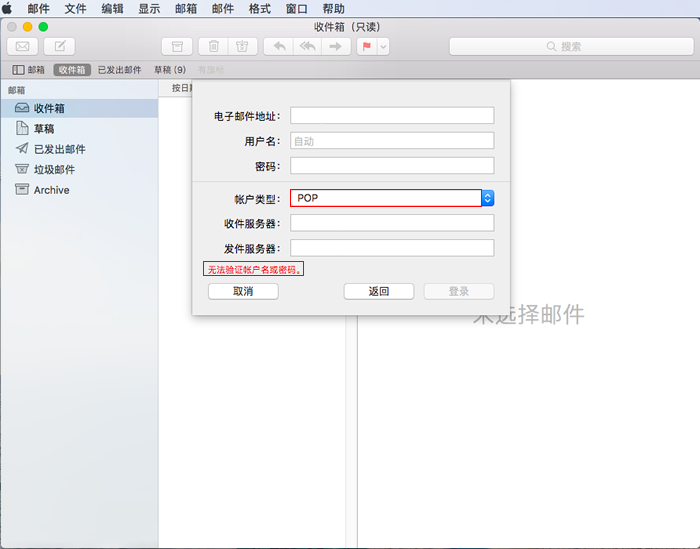
第二步:电子邮件地址:username@ecust.edu.cn
密码:******
点击“登录”

点击“登录”后会有报错提示“无法验证账户名或密码“
账户类型选择“POP”
收件服务器:pophz.qiye.163.com
发件服务器:smtphz.qiye.163.com, 点击“登录”,即可创建成功。
第三步:如果您的邮件接收或发送不需要采用SSL加密:进入自动管理连接设置,接收邮件端口参数为:110,不勾选“使用LTLS/SSL”,发送邮件端口号为25,不勾选“使用LTLS/SSL”。
点击“邮件”---偏好设置---账户---服务器设置---勾选“自动管理连接设置”


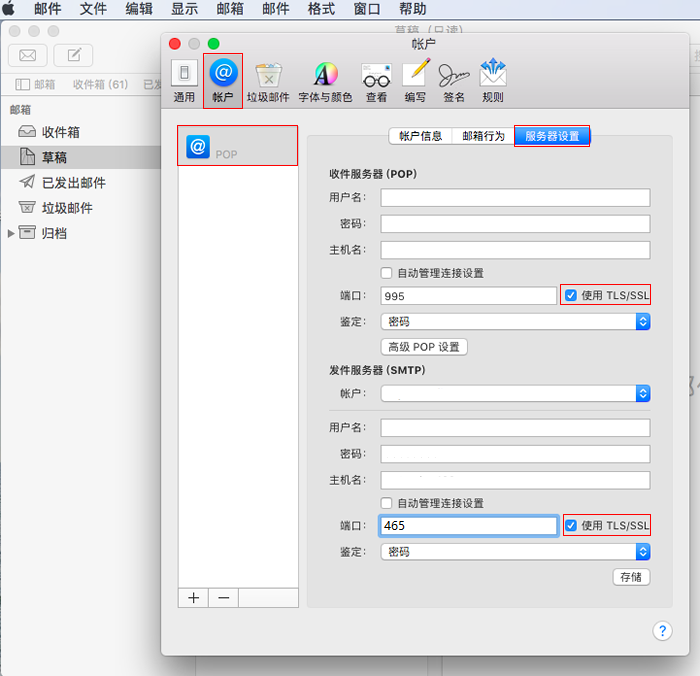
我们强烈推荐您使用SSL加密设置邮件接收和发送,邮箱使用更安全,接收邮件端口参数为:995,勾选“使用LTLS/SSL”,发送邮件端口为:465,勾选“使用LTLS/SSL”。